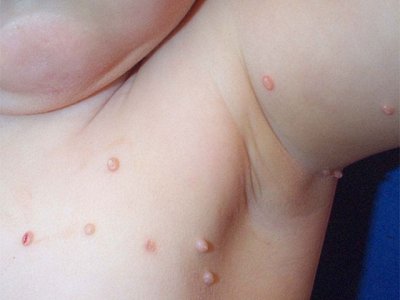
The good thing is that you can remove them in your home without going to the doctor. All you need is just one ingredient, which is apple cider vinegar. That’s all you need to remove them without bleeding and without any scars.
Small warts are actually benign skin growths which look like soft balloons hanging out of the skin. These growths are totally harmless, but since they can appear on pretty unpleasant areas (especially on the neck area) most people want to get rid of them.
Fortunately, if you want to remove them, you do not need to go to your doctor or go through a surgery. Instead of doing that, you can use one ingredients which can help in the process of removing them apple cider vinegar.
How to use apple cider vinegar to remove warts:
How to use apple cider vinegar to remove warts:
it worked in less than two weeks Put 2 to 3 apple cider vinegar drops onto a band aid. Place the band aid directly onto the wart you are trying to remove. You can either use the same band aid for 5 days or, if you want better results, you can change the band aid, with 2 drops of apple cider vinegar on it, every day. After only 5 days, the unwanted wart will disappear.
The great thing is, it will not leave any kind of mark or scar.Maybe it’s normal for it to go this fast, but I sure didn’t expect it. I started by soaking a wadded up hunk of kleenex (or cotton ball) in apple cider vinegar and holding it onto the wart on the back of my ankle with a bandaid. (It stinks a little, so I’m glad it was all the way down at my foot.) I did this before bed for 3 nights in a row.
In the mornings I took it off. After those 3 nights, it had turned black. But then I forgot about it for a couple of days, maybe this was good, to let it dry out. Then I sterilized some scissors (with steaming hot water), let them cool and clipped the black part off. It was definitely smaller! I washed good after messing with it, just in case it might spread. Then I started the same procedure again, but it started to hurt this time, so I just let it heal up for a few days.
Then I did it all again, and this time after only two nights it turned black again. A couple of days later I noticed that it was a little crusty (gross I know, sorry), so I picked the black part off. This time the whole wart peeled off bringing some of it from below the skin level, so there was even an indentation there.
I love learning about all natural cures like this, especially with something as easy to use.


Post a Comment